Joondalup:
08 9301 1300
O'Connor:
08 9314 1325
Mandurah:
08 9581 8611
Free Quote
Display Centres
Home
All Pools
All Pools
Small Swimming Pools Perth 2.6m – 6.9m
Medium Swimming Pools 7.0m – 9.4m
Large Swimming Pools 9.5m- 12.5m
Plunge Pools
Pool And Spas
Water Features
Pool Accessories
View Full Colour Range
Pool Ranges
Azure
Azure 5m x 3.2m
Azure 6m x 3.2m
Azure 7m x 3.2m
Brampton
Brampton 5.2m x 4.4m
Brampton 6.2m x 4.4m
Brampton 7.2m x 4.4m
Brampton 8.2m x 4.4m
Brampton 9.2m x 4.4m
Brampton 10.2m x 4.4m
Brampton 11.2m x 4.4m
Brampton 12.1m x 4.4m
Brampton Slimline
Brampton Slimline 6.2m x 3.5m
Brampton Slimline 7.2m x 3.5m
Riviera
Riviera 4.0m x 3.0m
Riviera 5.0m x 3.0m
Riviera 6.0m x 3.0m
Riviera 7.0m x 3.0m
Riviera 8.0m x 3.0m
Madison
Madison 5m x 4m
Madison 6m x 4m
Madison 7m x 4m
Madison 8m x 4m
Sunseeker
Sunseeker 7.6m x 4.4m
sunseeker 8.6m x 4.4m
Sunseeker 10.2m x 4.4m
Sunseeker Slimline
Sunseeker Slimline 6.2m x 3.5m
Sunseeker Slimline 7.2m x 3.5m
Sunseeker Slimline 8.2m x 3.5m
Manhattan
Manhattan 7.6m x 4.4m
Manhattan 8.6m x 4.4m
Manhattan 9.6m x 4.4m
Manhattan 10.6m x 4.4m
Manhattan 12.2m x 4.4m
Manhattan Slimline
Manhattan Slimline 6.2m x 3.5m
Manhattan Slimline 7.2m x 3.5m
Manhattan Slimline 8.2m x 3.5m
Majestic
Majestic 6.5m x 3.9m
Majestic 7.5m x 4.4m
Majestic 8.5m x 4.4m
Majestic 9.5m x 4.4m
Majestic 10.5m x 4.4m
Majestic Slimline
Majestic Slimline 6.2m x 3.5m
Majestic Slimline 7.2m x 3.5m
Majestic Slimline 10.5m x 3.5m
Sorrento
Sorrento 6.1m x 2.8m
Sorrento 7.1m x 2.8m
Sorrento 8.1m x 2.8m
Sorrento 9.1m x 2.8m
Amalfi
Amalfi 4.2m x 2.8m
Amalfi 5.2m x 2.8m
Amalfi 6.2m x 2.8m
Amalfi 7.2m x 2.8m
Caprice Slimline
Caprice Slimline 4.2m x 2.8m
Caprice Slimline 5.2m x 2.8m
Monaco
Monaco 7.5m x 3.8m
Monaco 8.5m x 3.8m
Monaco 9.5m x 3.8m
Monaco 10.5m x 3.8m
Monaco Slimline
Monaco Slimline 7.2m x 2.8m
Monaco Slimline 6.2m x 2.8m
The Resort 8.1m x 5.2m
The Resort 12.2m x 5.2m
Lap Pool 8.3m
Lap Pool 12.20m
Inground Swimming Pools Perth
Plunge Pool Range
Ultimate Plunge Pool
Monaco Plunge Pool
Spas
Alfresco Swim Spa
Hamilton Spa
Monaco Spa
Colour Range
Why Choose Us?
Installation Process
Our Pools vs Competitors
Quality Control
5 Tick Assurance
Warranty
Swim Now Pay Later
Fibreglass vs Concrete Pools
Pool Construction Layers
About Us
Awards
Pool Builders Perth
Installation
Brochure
Buyers Guide
Testimonials
News
Articles Featured In The WA Newspaper
Blog
Contact Us
Display Centres
Joondalup Display Centre
Mandurah Display Centre
O’Connor Display Centre
Find A Pool Builder
Lap Pools Perth
Enquire Online
Country Locations
Fibreglass Pools Albany
Fibreglass Pools Augusta
Fibreglass Pools Broome
Fibreglass Pools Bunbury
Fibreglass Pools Busselton
Fibreglass Pools Carnarvon
Fibreglass Pools Derby
Fibreglass Pools Dunsborough
Fibreglass Pools Esperance
Fibreglass Pools Exmouth
Fibreglass Pools Geraldton
Fibreglass Pools Joondalup
Fibreglass Pools Kalbarri
Fibreglass Pools Kalgoorlie
Fibreglass Pools Kalgoorlie & Goldfields
Fibreglass Pools Karratha
Fibreglass Pools Katanning
Fibreglass Pools Mandurah
Fibreglass Pools Margaret River
Fibreglass Pools Newman
Fibreglass Pools Northam
Fibreglass Pools Pilbara
Fibreglass Pools Port Hedland
Fibreglass Pools South West WA
Fibreglass Pools Harrisdale
Fibreglass Pools Shenton Park
Fibreglass Pools Subiaco
Fibreglass Pools Attadale
Fibreglass Pools Rossmoyne
Fibreglass Pools Willetton
Fibreglass Pools Churchlands
Fibreglass Pools Ellenbrook
Home
All Pools
All Pools
Small Swimming Pools Perth 2.6m – 6.9m
Medium Swimming Pools 7.0m – 9.4m
Large Swimming Pools 9.5m- 12.5m
Plunge Pools
Pool And Spas
Water Features
Pool Accessories
View Full Colour Range
Pool Ranges
Azure
Azure 5m x 3.2m
Azure 6m x 3.2m
Azure 7m x 3.2m
Brampton
Brampton 5.2m x 4.4m
Brampton 6.2m x 4.4m
Brampton 7.2m x 4.4m
Brampton 8.2m x 4.4m
Brampton 9.2m x 4.4m
Brampton 10.2m x 4.4m
Brampton 11.2m x 4.4m
Brampton 12.1m x 4.4m
Brampton Slimline
Brampton Slimline 6.2m x 3.5m
Brampton Slimline 7.2m x 3.5m
Riviera
Riviera 4.0m x 3.0m
Riviera 5.0m x 3.0m
Riviera 6.0m x 3.0m
Riviera 7.0m x 3.0m
Riviera 8.0m x 3.0m
Madison
Madison 5m x 4m
Madison 6m x 4m
Madison 7m x 4m
Madison 8m x 4m
Sunseeker
Sunseeker 7.6m x 4.4m
sunseeker 8.6m x 4.4m
Sunseeker 10.2m x 4.4m
Sunseeker Slimline
Sunseeker Slimline 6.2m x 3.5m
Sunseeker Slimline 7.2m x 3.5m
Sunseeker Slimline 8.2m x 3.5m
Manhattan
Manhattan 7.6m x 4.4m
Manhattan 8.6m x 4.4m
Manhattan 9.6m x 4.4m
Manhattan 10.6m x 4.4m
Manhattan 12.2m x 4.4m
Manhattan Slimline
Manhattan Slimline 6.2m x 3.5m
Manhattan Slimline 7.2m x 3.5m
Manhattan Slimline 8.2m x 3.5m
Majestic
Majestic 6.5m x 3.9m
Majestic 7.5m x 4.4m
Majestic 8.5m x 4.4m
Majestic 9.5m x 4.4m
Majestic 10.5m x 4.4m
Majestic Slimline
Majestic Slimline 6.2m x 3.5m
Majestic Slimline 7.2m x 3.5m
Majestic Slimline 10.5m x 3.5m
Sorrento
Sorrento 6.1m x 2.8m
Sorrento 7.1m x 2.8m
Sorrento 8.1m x 2.8m
Sorrento 9.1m x 2.8m
Amalfi
Amalfi 4.2m x 2.8m
Amalfi 5.2m x 2.8m
Amalfi 6.2m x 2.8m
Amalfi 7.2m x 2.8m
Caprice Slimline
Caprice Slimline 4.2m x 2.8m
Caprice Slimline 5.2m x 2.8m
Monaco
Monaco 7.5m x 3.8m
Monaco 8.5m x 3.8m
Monaco 9.5m x 3.8m
Monaco 10.5m x 3.8m
Monaco Slimline
Monaco Slimline 7.2m x 2.8m
Monaco Slimline 6.2m x 2.8m
The Resort 8.1m x 5.2m
The Resort 12.2m x 5.2m
Lap Pool 8.3m
Lap Pool 12.20m
Inground Swimming Pools Perth
Plunge Pool Range
Ultimate Plunge Pool
Monaco Plunge Pool
Spas
Alfresco Swim Spa
Hamilton Spa
Monaco Spa
Colour Range
Why Choose Us?
Installation Process
Our Pools vs Competitors
Quality Control
5 Tick Assurance
Warranty
Swim Now Pay Later
Fibreglass vs Concrete Pools
Pool Construction Layers
About Us
Awards
Pool Builders Perth
Installation
Brochure
Buyers Guide
Testimonials
News
Articles Featured In The WA Newspaper
Blog
Contact Us
Display Centres
Joondalup Display Centre
Mandurah Display Centre
O’Connor Display Centre
Find A Pool Builder
Lap Pools Perth
Enquire Online
Country Locations
Fibreglass Pools Albany
Fibreglass Pools Augusta
Fibreglass Pools Broome
Fibreglass Pools Bunbury
Fibreglass Pools Busselton
Fibreglass Pools Carnarvon
Fibreglass Pools Derby
Fibreglass Pools Dunsborough
Fibreglass Pools Esperance
Fibreglass Pools Exmouth
Fibreglass Pools Geraldton
Fibreglass Pools Joondalup
Fibreglass Pools Kalbarri
Fibreglass Pools Kalgoorlie
Fibreglass Pools Kalgoorlie & Goldfields
Fibreglass Pools Karratha
Fibreglass Pools Katanning
Fibreglass Pools Mandurah
Fibreglass Pools Margaret River
Fibreglass Pools Newman
Fibreglass Pools Northam
Fibreglass Pools Pilbara
Fibreglass Pools Port Hedland
Fibreglass Pools South West WA
Fibreglass Pools Harrisdale
Fibreglass Pools Shenton Park
Fibreglass Pools Subiaco
Fibreglass Pools Attadale
Fibreglass Pools Rossmoyne
Fibreglass Pools Willetton
Fibreglass Pools Churchlands
Fibreglass Pools Ellenbrook
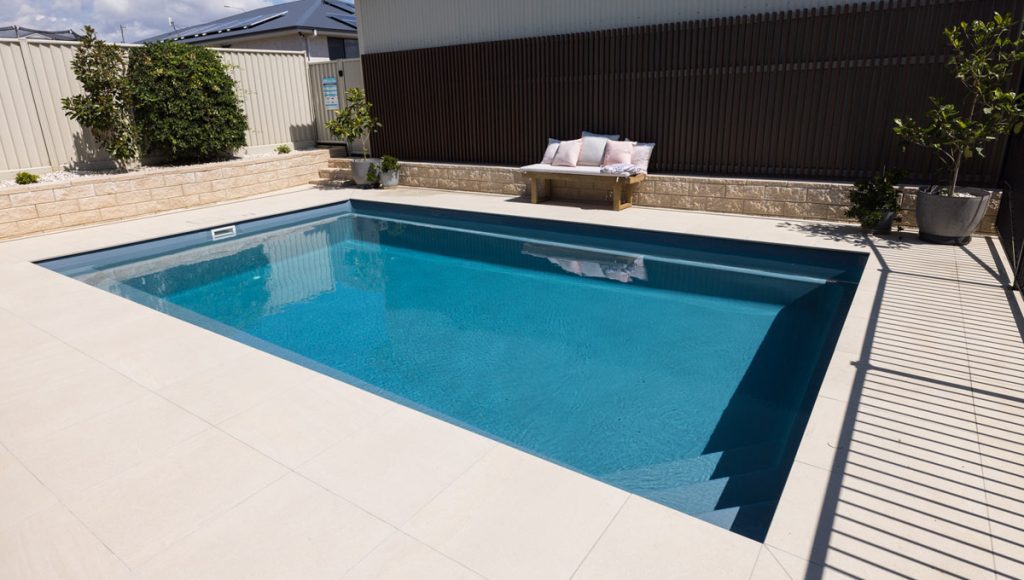
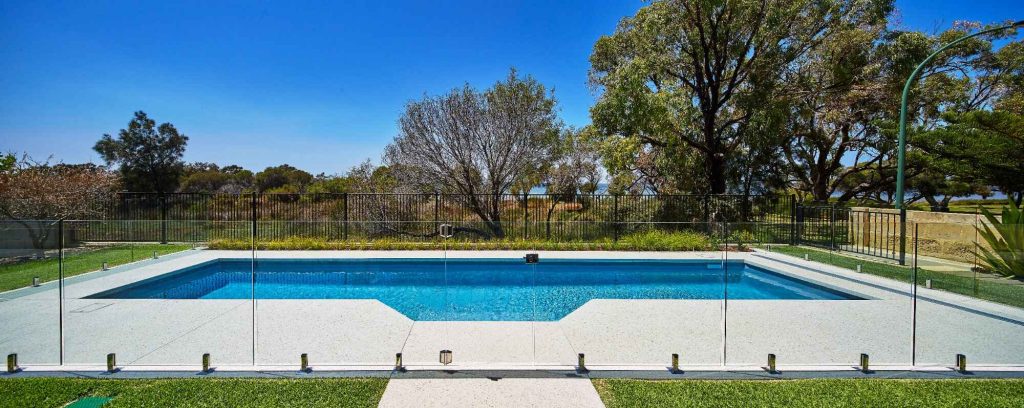
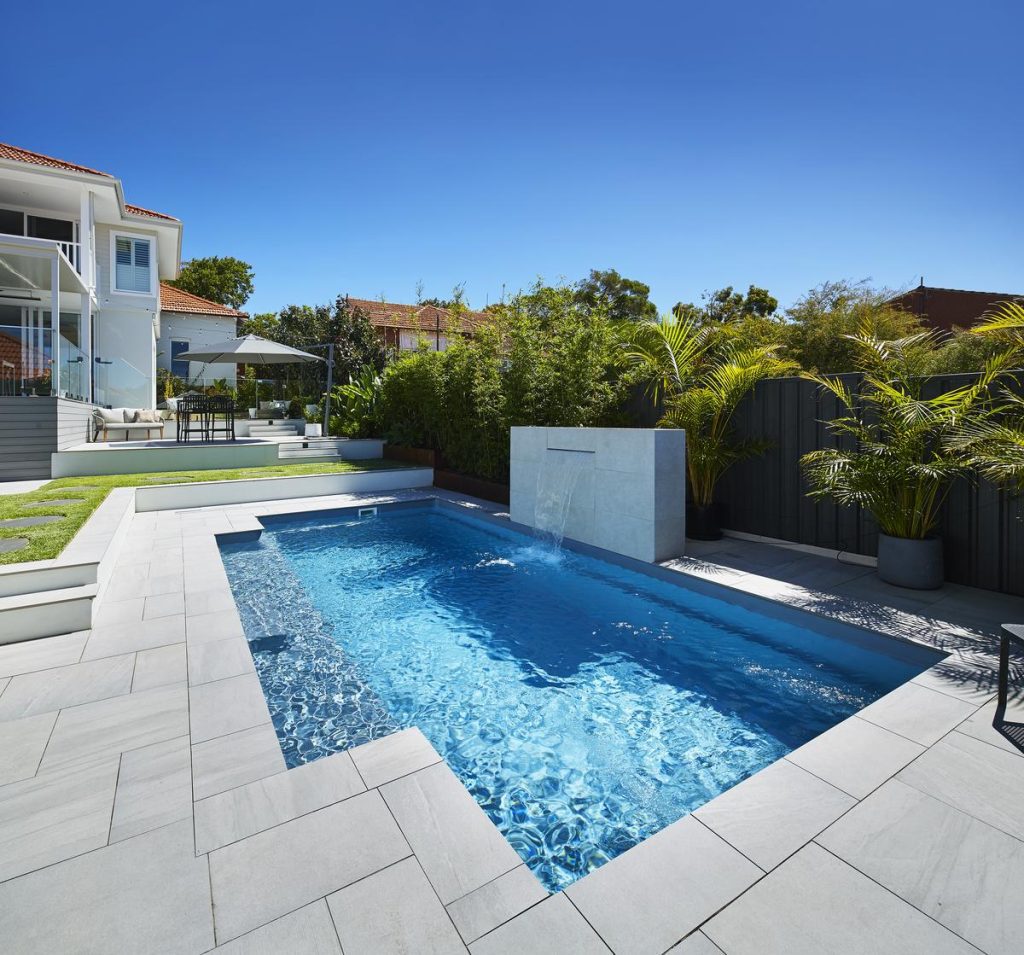
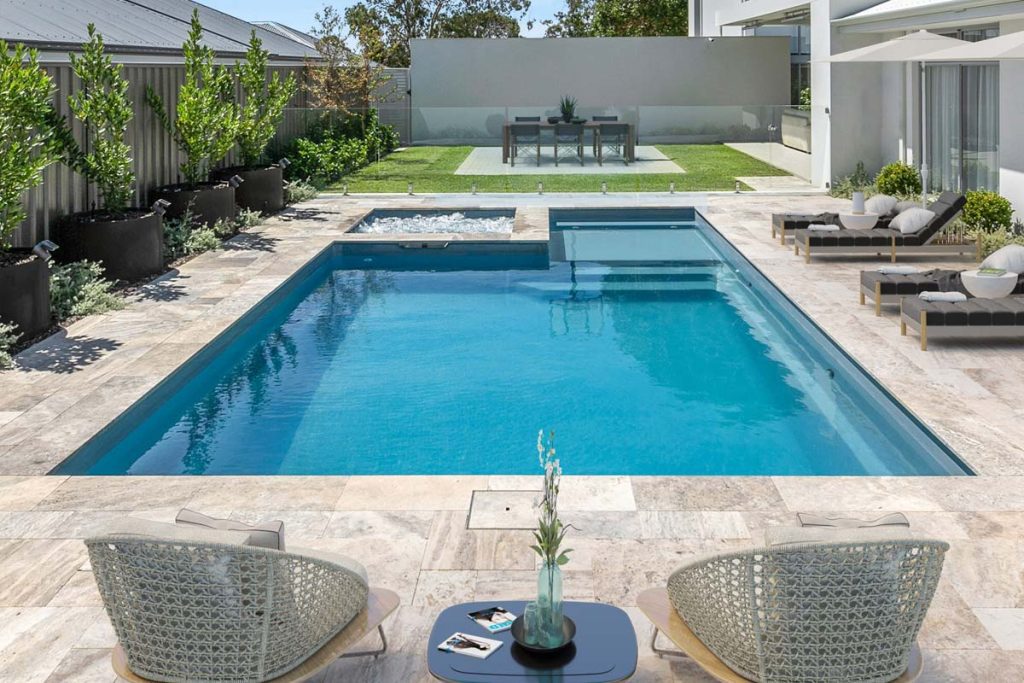
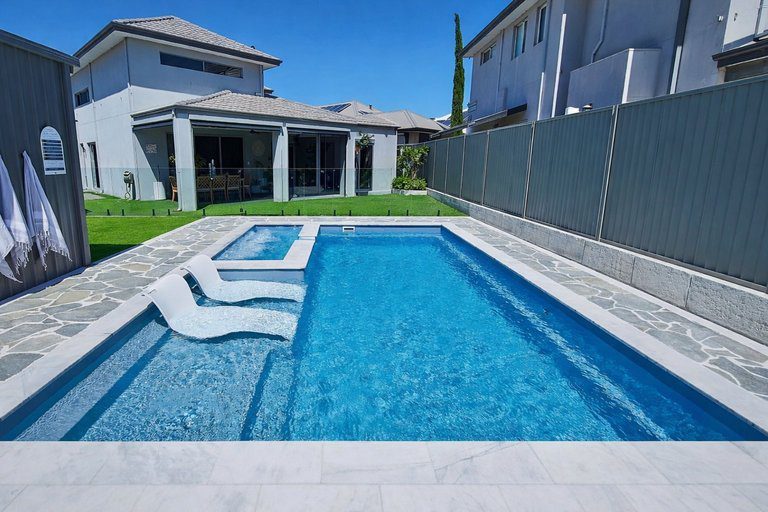
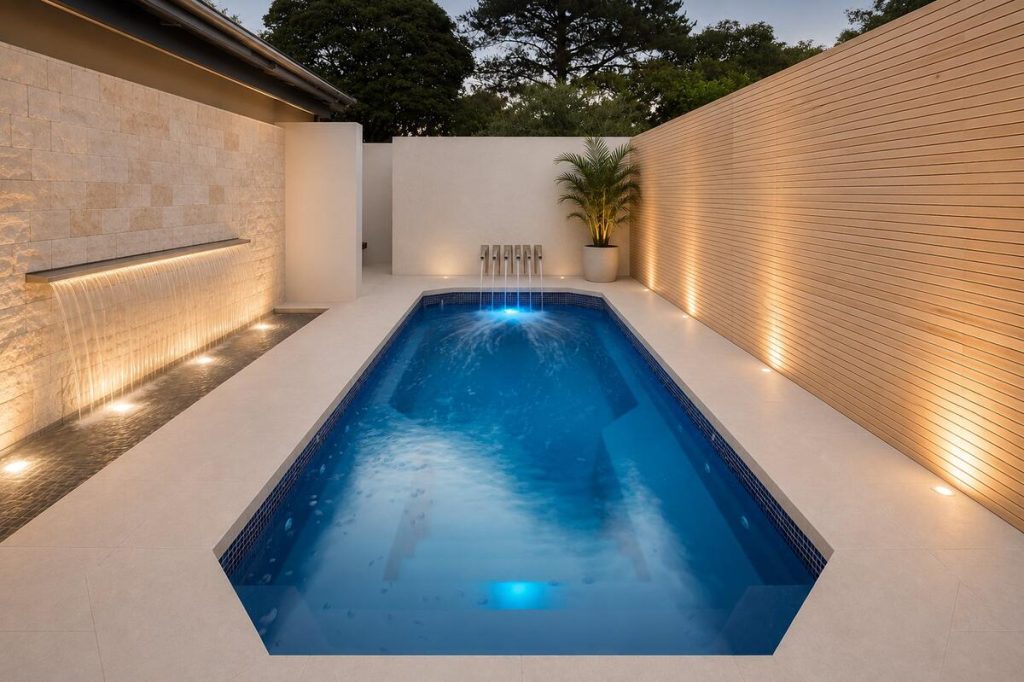
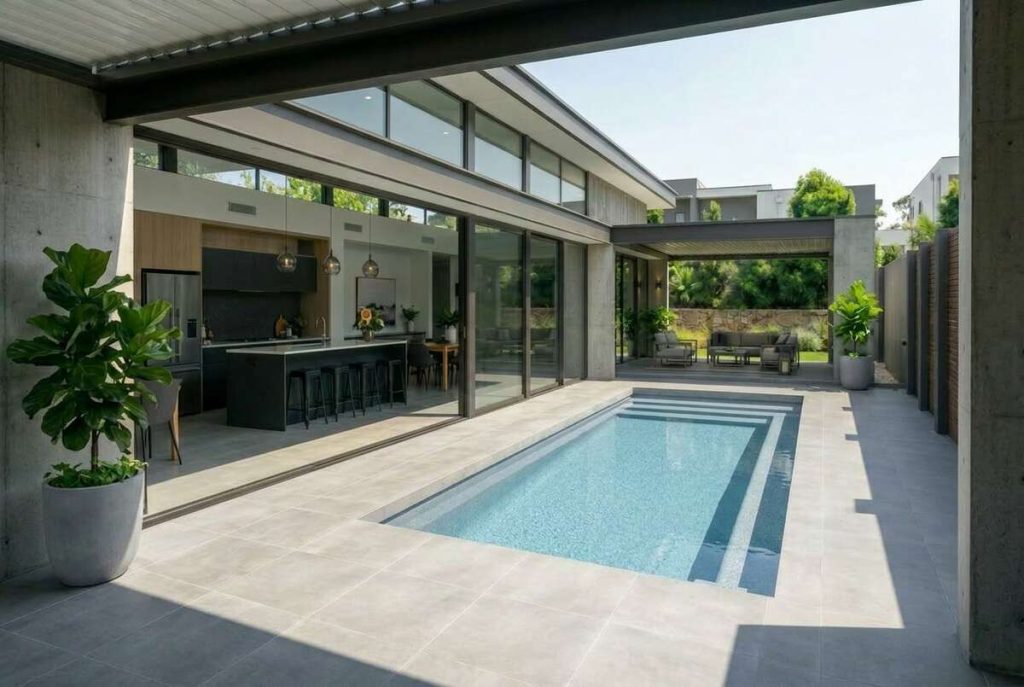
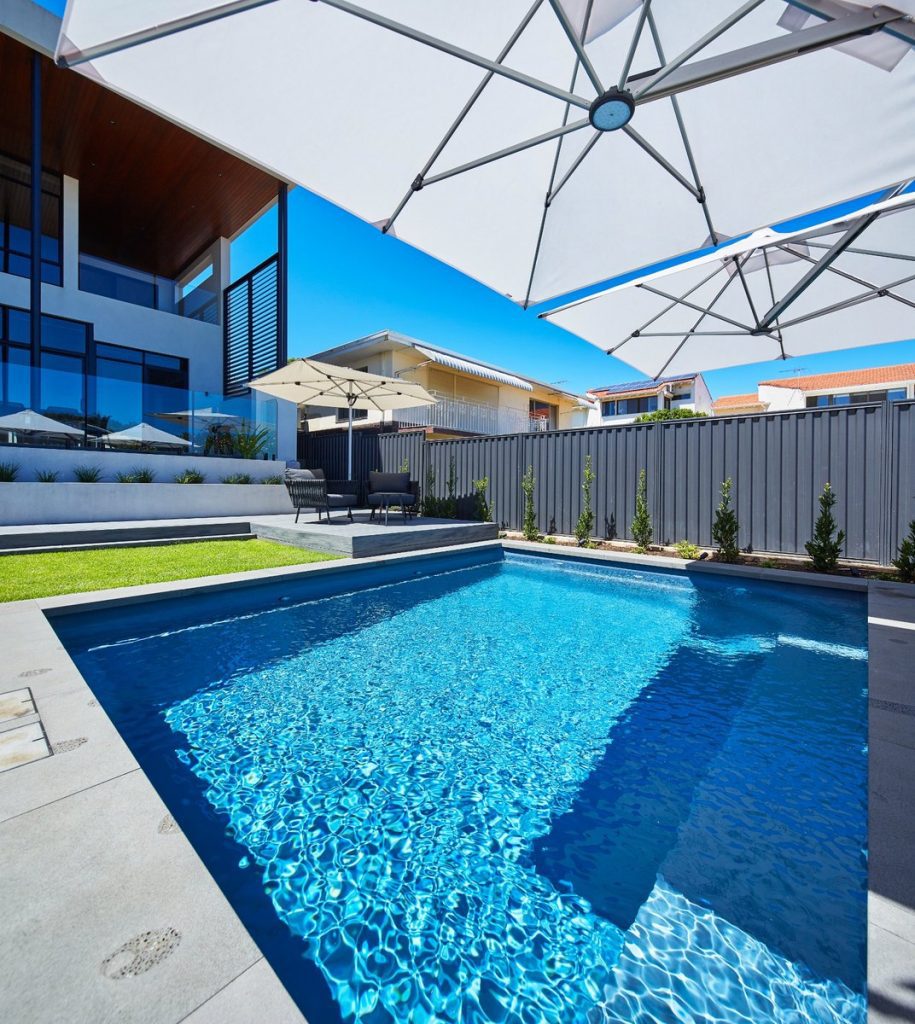
Hampton Grey Shimmer
Select the pool you would like to view below.
Back to Colours
Brampton 7.2m x 4.4m Hampton Grey Shimmer
https://youtu.be/60Bzufb_P-8
["https:\/\/www.barrierreefpoolsperth.com.au\/wp-content\/uploads\/brampton-8.2m-4.2m-hampton-grey-shimmer-warwick-galleryimage-2-1024x580.jpg","https:\/\/www.barrierreefpoolsperth.com.au\/wp-content\/uploads\/brampton-8.2m-4.2m-hampton-grey-shimmer-warwick-galleryimage-1024x580.jpg","https:\/\/www.barrierreefpoolsperth.com.au\/wp-content\/uploads\/brampton-8.2m-4.2m-hampton-grey-shimmer-warwick-galleryimage-3-1024x580.jpg","https:\/\/www.barrierreefpoolsperth.com.au\/wp-content\/uploads\/brampton-8.2m-4.2m-hampton-grey-shimmer-warwick-galleryimage-4-1024x580.jpg","https:\/\/www.barrierreefpoolsperth.com.au\/wp-content\/uploads\/brampton-8.2m-4.2m-hampton-grey-shimmer-warwick-galleryimage-6-1024x580.jpg","https:\/\/www.barrierreefpoolsperth.com.au\/wp-content\/uploads\/brampton-8.2m-4.2m-hampton-grey-shimmer-warwick-galleryimage-5-1024x580.jpg"]
Watch Video
✕
View Details
Lap Pool 12.2m x 3.5m Hampton Grey Shimmer Location Falcon
https://vimeo.com/1161608315?fl=ip&fe=ec
["https:\/\/www.barrierreefpoolsperth.com.au\/wp-content\/uploads\/BRP_Lap-Pool_12m_col-hgs_01-1024x683.jpg","https:\/\/www.barrierreefpoolsperth.com.au\/wp-content\/uploads\/BRP_Lap-Pool_12m_col-hgs_04-1024x683.jpg","https:\/\/www.barrierreefpoolsperth.com.au\/wp-content\/uploads\/BRP_Lap-Pool_12m_col-hgs_07-1024x683.jpg","https:\/\/www.barrierreefpoolsperth.com.au\/wp-content\/uploads\/BRP_Lap-Pool_12m_col-hgs_10-1024x683.jpg","https:\/\/www.barrierreefpoolsperth.com.au\/wp-content\/uploads\/BRP_Lap-Pool_12m_col-hgs_03-1024x682.jpg","https:\/\/www.barrierreefpoolsperth.com.au\/wp-content\/uploads\/BRP_Lap-Pool_12m_col-hgs_06-1024x682.jpg","https:\/\/www.barrierreefpoolsperth.com.au\/wp-content\/uploads\/BRP_Lap-Pool_12m_col-hgs_05-1024x683.jpg","https:\/\/www.barrierreefpoolsperth.com.au\/wp-content\/uploads\/BRP_Lap-Pool_12m_col-hgs_08-1024x683.jpg","https:\/\/www.barrierreefpoolsperth.com.au\/wp-content\/uploads\/BRP_Lap-Pool_12m_col-hgs_09.jpg","https:\/\/www.barrierreefpoolsperth.com.au\/wp-content\/uploads\/BRP_Lap-Pool_12m_col-hgs_02-1024x683.jpg"]
Watch Video
✕
View Details
Madison 5m x 4m Hampton Grey Shimmer Location Joondalup
https://vimeo.com/1179052142?share=copy&fl=sv&fe=ci
["https:\/\/www.barrierreefpoolsperth.com.au\/wp-content\/uploads\/madison-5m-hampton-grey-shimmer-joondalup-1-1024x861.jpg","https:\/\/www.barrierreefpoolsperth.com.au\/wp-content\/uploads\/madison-5m-hampton-grey-shimmer-joondalup-4-1024x910.jpg","https:\/\/www.barrierreefpoolsperth.com.au\/wp-content\/uploads\/madison-5m-hampton-grey-shimmer-joondalup-3-1024x808.jpg","https:\/\/www.barrierreefpoolsperth.com.au\/wp-content\/uploads\/madison-5m-hampton-grey-shimmer-joondalup-2-1024x769.jpg"]
Watch Video
✕
View Details
Majestic 7.6m x 4.4m Hampton Grey Shimmer Claremont
https://youtu.be/Alsx9HIk3gw
["https:\/\/www.barrierreefpoolsperth.com.au\/wp-content\/uploads\/majestic-7-5-m-hampton-grey-shimmer-claremont-hero-1024x531.jpg","https:\/\/www.barrierreefpoolsperth.com.au\/wp-content\/uploads\/majestic-7-5-m-hampton-grey-shimmer-claremont-1-1024x1005.jpg","https:\/\/www.barrierreefpoolsperth.com.au\/wp-content\/uploads\/majestic-7-5-m-hampton-grey-shimmer-claremont-2-1024x1007.jpg","https:\/\/www.barrierreefpoolsperth.com.au\/wp-content\/uploads\/majestic-7-5-m-hampton-grey-shimmer-claremont-3-1024x958.jpg","https:\/\/www.barrierreefpoolsperth.com.au\/wp-content\/uploads\/majestic-7-5-m-hampton-grey-shimmer-claremont-4-1024x955.jpg","https:\/\/www.barrierreefpoolsperth.com.au\/wp-content\/uploads\/majestic-7-5-m-hampton-grey-shimmer-claremont-5-1024x516.jpg","https:\/\/www.barrierreefpoolsperth.com.au\/wp-content\/uploads\/majestic-7-5-m-hampton-grey-shimmer-claremont-6-1024x683.jpg","https:\/\/www.barrierreefpoolsperth.com.au\/wp-content\/uploads\/majestic-7-5-m-hampton-grey-shimmer-claremont-7-1024x683.jpg","https:\/\/www.barrierreefpoolsperth.com.au\/wp-content\/uploads\/majestic-7-5-m-hampton-grey-shimmer-claremont-8-1024x683.jpg","https:\/\/www.barrierreefpoolsperth.com.au\/wp-content\/uploads\/majestic-7-5-m-hampton-grey-shimmer-claremont-9-1024x683.jpg","https:\/\/www.barrierreefpoolsperth.com.au\/wp-content\/uploads\/majestic-7-5-m-hampton-grey-shimmer-claremont-10-1024x683.jpg","https:\/\/www.barrierreefpoolsperth.com.au\/wp-content\/uploads\/majestic-7-5-m-hampton-grey-shimmer-claremont-11-683x1024.jpg","https:\/\/www.barrierreefpoolsperth.com.au\/wp-content\/uploads\/majestic-7-5-m-hampton-grey-shimmer-claremont-12-1024x683.jpg"]
Watch Video
✕
View Details
Manhattan 7.6m x 4.4m Hampton Grey Shimmer Booragoon
https://youtu.be/xVNuS4wcuZ4
["https:\/\/www.barrierreefpoolsperth.com.au\/wp-content\/uploads\/brooklyn-7.6m-4.4m-hampton-grey-shimmer-booragoon-galleryimage-5-1024x580.jpg","https:\/\/www.barrierreefpoolsperth.com.au\/wp-content\/uploads\/brooklyn-7.6m-4.4m-hampton-grey-shimmer-booragoon-galleryimage-6-1024x580.jpg","https:\/\/www.barrierreefpoolsperth.com.au\/wp-content\/uploads\/brooklyn-7.6m-4.4m-hampton-grey-shimmer-booragoon-galleryimage-1-1024x580.jpg","https:\/\/www.barrierreefpoolsperth.com.au\/wp-content\/uploads\/brooklyn-7.6m-4.4m-hampton-grey-shimmer-booragoon-galleryimage-13-1024x580.jpg","https:\/\/www.barrierreefpoolsperth.com.au\/wp-content\/uploads\/brooklyn-7.6m-4.4m-hampton-grey-shimmer-booragoon-galleryimage-7-1024x580.jpg","https:\/\/www.barrierreefpoolsperth.com.au\/wp-content\/uploads\/brooklyn-7.6m-4.4m-hampton-grey-shimmer-booragoon-galleryimage-17-1024x580.jpg","https:\/\/www.barrierreefpoolsperth.com.au\/wp-content\/uploads\/brooklyn-7.6m-4.4m-hampton-grey-shimmer-booragoon-galleryimage-8-1024x580.jpg","https:\/\/www.barrierreefpoolsperth.com.au\/wp-content\/uploads\/brooklyn-7.6m-4.4m-hampton-grey-shimmer-booragoon-galleryimage-18-1024x580.jpg","https:\/\/www.barrierreefpoolsperth.com.au\/wp-content\/uploads\/brooklyn-7.6m-4.4m-hampton-grey-shimmer-booragoon-galleryimage-11-1024x580.jpg","https:\/\/www.barrierreefpoolsperth.com.au\/wp-content\/uploads\/brooklyn-7.6m-4.4m-hampton-grey-shimmer-booragoon-galleryimage-12-1024x580.jpg","https:\/\/www.barrierreefpoolsperth.com.au\/wp-content\/uploads\/brooklyn-7.6m-4.4m-hampton-grey-shimmer-booragoon-galleryimage-14-1024x580.jpg","https:\/\/www.barrierreefpoolsperth.com.au\/wp-content\/uploads\/brooklyn-7.6m-4.4m-hampton-grey-shimmer-booragoon-galleryimage-2-1024x580.jpg","https:\/\/www.barrierreefpoolsperth.com.au\/wp-content\/uploads\/brooklyn-7.6m-4.4m-hampton-grey-shimmer-booragoon-galleryimage-16-1024x580.jpg","https:\/\/www.barrierreefpoolsperth.com.au\/wp-content\/uploads\/brooklyn-7.6m-4.4m-hampton-grey-shimmer-booragoon-galleryimage-15-1024x580.jpg","https:\/\/www.barrierreefpoolsperth.com.au\/wp-content\/uploads\/brooklyn-7.6m-4.4m-hampton-grey-shimmer-booragoon-galleryimage-19-1024x580.jpg","https:\/\/www.barrierreefpoolsperth.com.au\/wp-content\/uploads\/brooklyn-7.6m-4.4m-hampton-grey-shimmer-booragoon-galleryimage-20-1024x580.jpg","https:\/\/www.barrierreefpoolsperth.com.au\/wp-content\/uploads\/brooklyn-7.6m-4.4m-hampton-grey-shimmer-booragoon-galleryimage-21-1024x580.jpg","https:\/\/www.barrierreefpoolsperth.com.au\/wp-content\/uploads\/brooklyn-7.6m-4.4m-hampton-grey-shimmer-booragoon-galleryimage-22-1024x580.jpg","https:\/\/www.barrierreefpoolsperth.com.au\/wp-content\/uploads\/brooklyn-7.6m-4.4m-hampton-grey-shimmer-booragoon-galleryimage-23-1024x580.jpg","https:\/\/www.barrierreefpoolsperth.com.au\/wp-content\/uploads\/brooklyn-7.6m-4.4m-hampton-grey-shimmer-booragoon-galleryimage-3-1024x580.jpg","https:\/\/www.barrierreefpoolsperth.com.au\/wp-content\/uploads\/brooklyn-7.6m-4.4m-hampton-grey-shimmer-booragoon-galleryimage-4-1024x580.jpg"]
Watch Video
✕
View Details
Manhattan 8.6m x 4.4m Hampton Grey Shimmer Wembley
https://youtu.be/5HFnZi8C2fY
["https:\/\/www.barrierreefpoolsperth.com.au\/wp-content\/uploads\/brooklyn-8.6m-4.4m-hampton-grey-shimmer-wembley-galleryimage-24-1024x580.jpg","https:\/\/www.barrierreefpoolsperth.com.au\/wp-content\/uploads\/brooklyn-8.6m-4.4m-hampton-grey-shimmer-wembley-galleryimage-11-1024x580.jpg","https:\/\/www.barrierreefpoolsperth.com.au\/wp-content\/uploads\/brooklyn-8.6m-4.4m-hampton-grey-shimmer-wembley-galleryimage-10-1024x580.jpg","https:\/\/www.barrierreefpoolsperth.com.au\/wp-content\/uploads\/brooklyn-8.6m-4.4m-hampton-grey-shimmer-wembley-galleryimage-12-1024x580.jpg","https:\/\/www.barrierreefpoolsperth.com.au\/wp-content\/uploads\/brooklyn-8.6m-4.4m-hampton-grey-shimmer-wembley-galleryimage-20-1024x580.jpg","https:\/\/www.barrierreefpoolsperth.com.au\/wp-content\/uploads\/brooklyn-8.6m-4.4m-hampton-grey-shimmer-wembley-galleryimage-13-1024x580.jpg","https:\/\/www.barrierreefpoolsperth.com.au\/wp-content\/uploads\/brooklyn-8.6m-4.4m-hampton-grey-shimmer-wembley-galleryimage-14-1024x580.jpg","https:\/\/www.barrierreefpoolsperth.com.au\/wp-content\/uploads\/brooklyn-8.6m-4.4m-hampton-grey-shimmer-wembley-galleryimage-15-1024x580.jpg","https:\/\/www.barrierreefpoolsperth.com.au\/wp-content\/uploads\/brooklyn-8.6m-4.4m-hampton-grey-shimmer-wembley-galleryimage-16-1024x580.jpg","https:\/\/www.barrierreefpoolsperth.com.au\/wp-content\/uploads\/brooklyn-8.6m-4.4m-hampton-grey-shimmer-wembley-galleryimage-30-1024x580.jpg","https:\/\/www.barrierreefpoolsperth.com.au\/wp-content\/uploads\/brooklyn-8.6m-4.4m-hampton-grey-shimmer-wembley-galleryimage-17-1024x580.jpg","https:\/\/www.barrierreefpoolsperth.com.au\/wp-content\/uploads\/brooklyn-8.6m-4.4m-hampton-grey-shimmer-wembley-galleryimage-19-1024x580.jpg","https:\/\/www.barrierreefpoolsperth.com.au\/wp-content\/uploads\/brooklyn-8.6m-4.4m-hampton-grey-shimmer-wembley-galleryimage-9-1024x580.jpg","https:\/\/www.barrierreefpoolsperth.com.au\/wp-content\/uploads\/brooklyn-8.6m-4.4m-hampton-grey-shimmer-wembley-galleryimage-21-1024x580.jpg","https:\/\/www.barrierreefpoolsperth.com.au\/wp-content\/uploads\/brooklyn-8.6m-4.4m-hampton-grey-shimmer-wembley-galleryimage-8-1024x580.jpg","https:\/\/www.barrierreefpoolsperth.com.au\/wp-content\/uploads\/brooklyn-8.6m-4.4m-hampton-grey-shimmer-wembley-galleryimage-22-1024x580.jpg","https:\/\/www.barrierreefpoolsperth.com.au\/wp-content\/uploads\/brooklyn-8.6m-4.4m-hampton-grey-shimmer-wembley-galleryimage-23-1024x580.jpg","https:\/\/www.barrierreefpoolsperth.com.au\/wp-content\/uploads\/brooklyn-8.6m-4.4m-hampton-grey-shimmer-wembley-galleryimage-25-1024x580.jpg","https:\/\/www.barrierreefpoolsperth.com.au\/wp-content\/uploads\/brooklyn-8.6m-4.4m-hampton-grey-shimmer-wembley-galleryimage-3-1024x580.jpg","https:\/\/www.barrierreefpoolsperth.com.au\/wp-content\/uploads\/brooklyn-8.6m-4.4m-hampton-grey-shimmer-wembley-galleryimage-26-1024x580.jpg","https:\/\/www.barrierreefpoolsperth.com.au\/wp-content\/uploads\/brooklyn-8.6m-4.4m-hampton-grey-shimmer-wembley-galleryimage-4-1024x580.jpg","https:\/\/www.barrierreefpoolsperth.com.au\/wp-content\/uploads\/brooklyn-8.6m-4.4m-hampton-grey-shimmer-wembley-galleryimage-28-1024x580.jpg","https:\/\/www.barrierreefpoolsperth.com.au\/wp-content\/uploads\/brooklyn-8.6m-4.4m-hampton-grey-shimmer-wembley-galleryimage-18-1024x580.jpg","https:\/\/www.barrierreefpoolsperth.com.au\/wp-content\/uploads\/brooklyn-8.6m-4.4m-hampton-grey-shimmer-wembley-galleryimage-29-1024x580.jpg","https:\/\/www.barrierreefpoolsperth.com.au\/wp-content\/uploads\/brooklyn-8.6m-4.4m-hampton-grey-shimmer-wembley-galleryimage-27-1024x580.jpg","https:\/\/www.barrierreefpoolsperth.com.au\/wp-content\/uploads\/brooklyn-8.6m-4.4m-hampton-grey-shimmer-wembley-galleryimage-31-1024x580.jpg","https:\/\/www.barrierreefpoolsperth.com.au\/wp-content\/uploads\/brooklyn-8.6m-4.4m-hampton-grey-shimmer-wembley-galleryimage-1-1024x580.jpg","https:\/\/www.barrierreefpoolsperth.com.au\/wp-content\/uploads\/brooklyn-8.6m-4.4m-hampton-grey-shimmer-wembley-galleryimage-32-1024x580.jpg","https:\/\/www.barrierreefpoolsperth.com.au\/wp-content\/uploads\/brooklyn-8.6m-4.4m-hampton-grey-shimmer-wembley-galleryimage-33-1024x580.jpg","https:\/\/www.barrierreefpoolsperth.com.au\/wp-content\/uploads\/brooklyn-8.6m-4.4m-hampton-grey-shimmer-wembley-galleryimage-5-1024x580.jpg","https:\/\/www.barrierreefpoolsperth.com.au\/wp-content\/uploads\/brooklyn-8.6m-4.4m-hampton-grey-shimmer-wembley-galleryimage-2-1024x580.jpg","https:\/\/www.barrierreefpoolsperth.com.au\/wp-content\/uploads\/brooklyn-8.6m-4.4m-hampton-grey-shimmer-wembley-galleryimage-6-1024x580.jpg","https:\/\/www.barrierreefpoolsperth.com.au\/wp-content\/uploads\/brooklyn-8.6m-4.4m-hampton-grey-shimmer-wembley-galleryimage-7-1024x580.jpg"]
Watch Video
✕
View Details
Monaco 7.5m x 3.8m Hampton Grey Shimmer Location Safety Bay
https://www.youtube.com/watch?v=tQTxern5IKw
["https:\/\/www.barrierreefpoolsperth.com.au\/wp-content\/uploads\/billabong-7.5m-3.8m-hampton-grey-shimmer-safety-bay-galleryimage-18-1024x580.jpg","https:\/\/www.barrierreefpoolsperth.com.au\/wp-content\/uploads\/billabong-7.5m-3.8m-hampton-grey-shimmer-safety-bay-galleryimage-22-1024x580.jpg","https:\/\/www.barrierreefpoolsperth.com.au\/wp-content\/uploads\/billabong-7.5m-3.8m-hampton-grey-shimmer-safety-bay-galleryimage-24-1024x580.jpg","https:\/\/www.barrierreefpoolsperth.com.au\/wp-content\/uploads\/billabong-7.5m-3.8m-hampton-grey-shimmer-safety-bay-galleryimage-29-1024x580.jpg","https:\/\/www.barrierreefpoolsperth.com.au\/wp-content\/uploads\/billabong-7.5m-3.8m-hampton-grey-shimmer-safety-bay-galleryimage-1-1024x580.jpg","https:\/\/www.barrierreefpoolsperth.com.au\/wp-content\/uploads\/billabong-7.5m-3.8m-hampton-grey-shimmer-safety-bay-galleryimage-2-1024x580.jpg","https:\/\/www.barrierreefpoolsperth.com.au\/wp-content\/uploads\/billabong-7.5m-3.8m-hampton-grey-shimmer-safety-bay-galleryimage-3-1024x580.jpg","https:\/\/www.barrierreefpoolsperth.com.au\/wp-content\/uploads\/billabong-7.5m-3.8m-hampton-grey-shimmer-safety-bay-galleryimage-4-1024x580.jpg","https:\/\/www.barrierreefpoolsperth.com.au\/wp-content\/uploads\/billabong-7.5m-3.8m-hampton-grey-shimmer-safety-bay-galleryimage-5-1024x580.jpg","https:\/\/www.barrierreefpoolsperth.com.au\/wp-content\/uploads\/Monaco-7-5-m-hampton-grey-shimmer-safety-bay-1-1024x683.jpg","https:\/\/www.barrierreefpoolsperth.com.au\/wp-content\/uploads\/billabong-7.5m-3.8m-hampton-grey-shimmer-safety-bay-galleryimage-10-1024x580.jpg","https:\/\/www.barrierreefpoolsperth.com.au\/wp-content\/uploads\/billabong-7.5m-3.8m-hampton-grey-shimmer-safety-bay-galleryimage-11-1024x580.jpg","https:\/\/www.barrierreefpoolsperth.com.au\/wp-content\/uploads\/billabong-7.5m-3.8m-hampton-grey-shimmer-safety-bay-galleryimage-12-1024x580.jpg","https:\/\/www.barrierreefpoolsperth.com.au\/wp-content\/uploads\/billabong-7.5m-3.8m-hampton-grey-shimmer-safety-bay-galleryimage-13-1024x580.jpg","https:\/\/www.barrierreefpoolsperth.com.au\/wp-content\/uploads\/billabong-7.5m-3.8m-hampton-grey-shimmer-safety-bay-galleryimage-14-1024x580.jpg"]
Watch Video
✕
View Details
Monaco 7.5m x 3.8m with Hamilton Spa Hampton Grey Shimmer Location Duncraig
https://vimeo.com/1198274875?share=copy&fl=sv&fe=ci
["https:\/\/www.barrierreefpoolsperth.com.au\/wp-content\/uploads\/billabong-7.5m-3.8m-hampton-grey-shimmer-duncraig-galleryimage-8-1024x580.jpg","https:\/\/www.barrierreefpoolsperth.com.au\/wp-content\/uploads\/billabong-7.5m-3.8m-hampton-grey-shimmer-duncraig-galleryimage-16-1024x580.jpg","https:\/\/www.barrierreefpoolsperth.com.au\/wp-content\/uploads\/billabong-7.5m-3.8m-hampton-grey-shimmer-duncraig-galleryimage-17-1024x580.jpg","https:\/\/www.barrierreefpoolsperth.com.au\/wp-content\/uploads\/billabong-7.5m-3.8m-hampton-grey-shimmer-duncraig-galleryimage-19-1024x580.jpg","https:\/\/www.barrierreefpoolsperth.com.au\/wp-content\/uploads\/billabong-7.5m-3.8m-hampton-grey-shimmer-duncraig-galleryimage-20-1024x580.jpg","https:\/\/www.barrierreefpoolsperth.com.au\/wp-content\/uploads\/billabong-7.5m-3.8m-hampton-grey-shimmer-duncraig-galleryimage-15-1024x580.jpg","https:\/\/www.barrierreefpoolsperth.com.au\/wp-content\/uploads\/billabong-7.5m-3.8m-hampton-grey-shimmer-duncraig-galleryimage-21-1024x580.jpg","https:\/\/www.barrierreefpoolsperth.com.au\/wp-content\/uploads\/monaco-7-5m-hamilton-spa-hampton-grey-shimmer-duncraig-6-1024x1013.jpg","https:\/\/www.barrierreefpoolsperth.com.au\/wp-content\/uploads\/billabong-7.5m-3.8m-hampton-grey-shimmer-duncraig-galleryimage-22-1024x580.jpg","https:\/\/www.barrierreefpoolsperth.com.au\/wp-content\/uploads\/billabong-7.5m-3.8m-hampton-grey-shimmer-duncraig-galleryimage-23-1024x580.jpg","https:\/\/www.barrierreefpoolsperth.com.au\/wp-content\/uploads\/billabong-7.5m-3.8m-hampton-grey-shimmer-duncraig-galleryimage-24-1024x580.jpg","https:\/\/www.barrierreefpoolsperth.com.au\/wp-content\/uploads\/billabong-7.5m-3.8m-hampton-grey-shimmer-duncraig-galleryimage-25-1024x580.jpg","https:\/\/www.barrierreefpoolsperth.com.au\/wp-content\/uploads\/monaco-7-5m-hamilton-spa-hampton-grey-shimmer-duncraig-1-1024x683.jpg","https:\/\/www.barrierreefpoolsperth.com.au\/wp-content\/uploads\/monaco-7-5m-hamilton-spa-hampton-grey-shimmer-duncraig-2-1024x771.jpg","https:\/\/www.barrierreefpoolsperth.com.au\/wp-content\/uploads\/monaco-7-5m-hamilton-spa-hampton-grey-shimmer-duncraig-3-1024x623.jpg","https:\/\/www.barrierreefpoolsperth.com.au\/wp-content\/uploads\/monaco-7-5m-hamilton-spa-hampton-grey-shimmer-duncraig-5-1024x580.jpg","https:\/\/www.barrierreefpoolsperth.com.au\/wp-content\/uploads\/monaco-7-5m-hamilton-spa-hampton-grey-shimmer-duncraig-4-1024x437.jpg","https:\/\/www.barrierreefpoolsperth.com.au\/wp-content\/uploads\/monaco-7-5m-hamilton-spa-hampton-grey-shimmer-duncraig-7-1024x427.jpg"]
Watch Video
✕
View Details
Resort 12.2m x 5.2m Hampton Grey Shimmer Bedfordale
https://vimeo.com/1166199636?share=copy&fl=sv&fe=ci
["https:\/\/www.barrierreefpoolsperth.com.au\/wp-content\/uploads\/resort-12-2m-hampton-grey-shimmer-bedfordale-1-1024x918.jpg","https:\/\/www.barrierreefpoolsperth.com.au\/wp-content\/uploads\/resort-12-2m-hampton-grey-shimmer-bedfordale-2-1024x683.jpg","https:\/\/www.barrierreefpoolsperth.com.au\/wp-content\/uploads\/resort-12-2m-hampton-grey-shimmer-bedfordale-3-1024x625.jpg","https:\/\/www.barrierreefpoolsperth.com.au\/wp-content\/uploads\/resort-12-2m-hampton-grey-shimmer-bedfordale-4-1024x672.jpg","https:\/\/www.barrierreefpoolsperth.com.au\/wp-content\/uploads\/resort-12-2m-hampton-grey-shimmer-bedfordale-5-1024x683.jpg","https:\/\/www.barrierreefpoolsperth.com.au\/wp-content\/uploads\/resort-12-2m-hampton-grey-shimmer-bedfordale-7-1024x683.jpg","https:\/\/www.barrierreefpoolsperth.com.au\/wp-content\/uploads\/resort-12-2m-hampton-grey-shimmer-bedfordale-8-1024x683.jpg","https:\/\/www.barrierreefpoolsperth.com.au\/wp-content\/uploads\/resort-12-2m-hampton-grey-shimmer-bedfordale-6-1024x683.jpg","https:\/\/www.barrierreefpoolsperth.com.au\/wp-content\/uploads\/resort-12-2m-hampton-grey-shimmer-bedfordale-10-1024x684.jpg","https:\/\/www.barrierreefpoolsperth.com.au\/wp-content\/uploads\/resort-12-2m-hampton-grey-shimmer-bedfordale-11-1024x683.jpg","https:\/\/www.barrierreefpoolsperth.com.au\/wp-content\/uploads\/resort-12-2m-hampton-grey-shimmer-bedfordale-12-1024x683.jpg","https:\/\/www.barrierreefpoolsperth.com.au\/wp-content\/uploads\/resort-12-2m-hampton-grey-shimmer-bedfordale-9-1024x683.jpg","https:\/\/www.barrierreefpoolsperth.com.au\/wp-content\/uploads\/resort-12-2m-hampton-grey-shimmer-bedfordale-19-1024x683.jpg","https:\/\/www.barrierreefpoolsperth.com.au\/wp-content\/uploads\/resort-12-2m-hampton-grey-shimmer-bedfordale-20-1024x683.jpg","https:\/\/www.barrierreefpoolsperth.com.au\/wp-content\/uploads\/resort-12-2m-hampton-grey-shimmer-bedfordale-18-1024x472.jpg","https:\/\/www.barrierreefpoolsperth.com.au\/wp-content\/uploads\/resort-12-2m-hampton-grey-shimmer-bedfordale-16-957x1024.jpg","https:\/\/www.barrierreefpoolsperth.com.au\/wp-content\/uploads\/resort-12-2m-hampton-grey-shimmer-bedfordale-17-1024x409.jpg","https:\/\/www.barrierreefpoolsperth.com.au\/wp-content\/uploads\/resort-12-2m-hampton-grey-shimmer-bedfordale-15-1024x427.jpg","https:\/\/www.barrierreefpoolsperth.com.au\/wp-content\/uploads\/resort-12-2m-hampton-grey-shimmer-bedfordale-14-1024x412.jpg","https:\/\/www.barrierreefpoolsperth.com.au\/wp-content\/uploads\/resort-12-2m-hampton-grey-shimmer-bedfordale-13-683x1024.jpg"]
Watch Video
✕
View Details
Resort 8.1m x 5.2m Hampton Grey Shimmer Caversham
https://vimeo.com/1181382871?share=copy&fl=sv&fe=ci
["https:\/\/www.barrierreefpoolsperth.com.au\/wp-content\/uploads\/resort-8-1m-hampton-grey-shimmer-caversham-1-1024x683.jpg","https:\/\/www.barrierreefpoolsperth.com.au\/wp-content\/uploads\/resort-8-1m-hampton-grey-shimmer-caversham-2.jpg","https:\/\/www.barrierreefpoolsperth.com.au\/wp-content\/uploads\/resort-8-1m-hampton-grey-shimmer-caversham-3-1024x572.jpg","https:\/\/www.barrierreefpoolsperth.com.au\/wp-content\/uploads\/resort-8-1m-hampton-grey-shimmer-caversham-4-1024x683.jpg","https:\/\/www.barrierreefpoolsperth.com.au\/wp-content\/uploads\/resort-8-1m-hampton-grey-shimmer-caversham-5.jpg","https:\/\/www.barrierreefpoolsperth.com.au\/wp-content\/uploads\/resort-8-1m-hampton-grey-shimmer-caversham-6-1024x683.jpg","https:\/\/www.barrierreefpoolsperth.com.au\/wp-content\/uploads\/resort-8-1m-hampton-grey-shimmer-caversham-7-1024x683.jpg","https:\/\/www.barrierreefpoolsperth.com.au\/wp-content\/uploads\/resort-8-1m-hampton-grey-shimmer-caversham-8-1024x683.jpg","https:\/\/www.barrierreefpoolsperth.com.au\/wp-content\/uploads\/resort-8-1m-hampton-grey-shimmer-caversham-9-1024x683.jpg","https:\/\/www.barrierreefpoolsperth.com.au\/wp-content\/uploads\/resort-8-1m-hampton-grey-shimmer-caversham-10-1024x591.jpg","https:\/\/www.barrierreefpoolsperth.com.au\/wp-content\/uploads\/resort-8-1m-hampton-grey-shimmer-caversham-hero-1-1024x683.jpg","https:\/\/www.barrierreefpoolsperth.com.au\/wp-content\/uploads\/resort-8-1m-hampton-grey-shimmer-caversham-hero-2-1024x982.jpg"]
Watch Video
✕
View Details
Resort 8.1m x 5.2m Hampton Grey Shimmer Location Mandurah
https://vimeo.com/1181390127?share=copy&fl=sv&fe=ci
["https:\/\/www.barrierreefpoolsperth.com.au\/wp-content\/uploads\/resort-8-1m-hampton-grey-shimmer-mandurah-6-1-1024x683.jpg","https:\/\/www.barrierreefpoolsperth.com.au\/wp-content\/uploads\/resort-8-1m-hampton-grey-shimmer-mandurah-hero-1024x683.jpg","https:\/\/www.barrierreefpoolsperth.com.au\/wp-content\/uploads\/resort-8-1m-hampton-grey-shimmer-mandurah-7-1024x550.jpg","https:\/\/www.barrierreefpoolsperth.com.au\/wp-content\/uploads\/resort-8-1m-hampton-grey-shimmer-mandurah-5-1024x683.jpg","https:\/\/www.barrierreefpoolsperth.com.au\/wp-content\/uploads\/resort-8-1m-hampton-grey-shimmer-mandurah-4-1024x796.jpg","https:\/\/www.barrierreefpoolsperth.com.au\/wp-content\/uploads\/resort-8-1m-hampton-grey-shimmer-mandurah-3-1024x682.jpg","https:\/\/www.barrierreefpoolsperth.com.au\/wp-content\/uploads\/resort-8-1m-hampton-grey-shimmer-mandurah-2-1024x616.jpg","https:\/\/www.barrierreefpoolsperth.com.au\/wp-content\/uploads\/resort-8-1m-hampton-grey-shimmer-mandurah-1-1024x556.jpg"]
Watch Video
✕
View Details
Resort 8.1m x 5.2m Hampton Grey Shimmer Success
https://vimeo.com/1171962782?share=copy&fl=sv&fe=ci
["https:\/\/www.barrierreefpoolsperth.com.au\/wp-content\/uploads\/Resort-8_1m-x-5_2m-Hampton-Grey-Shimmer-success_1.jpg","https:\/\/www.barrierreefpoolsperth.com.au\/wp-content\/uploads\/Resort-8_1m-x-5_2m-Hampton-Grey-Shimmer-success_2.jpg","https:\/\/www.barrierreefpoolsperth.com.au\/wp-content\/uploads\/Resort-8_1m-x-5_2m-Hampton-Grey-Shimmer-success_3.jpg","https:\/\/www.barrierreefpoolsperth.com.au\/wp-content\/uploads\/Resort-8_1m-x-5_2m-Hampton-Grey-Shimmer-success_4.jpg","https:\/\/www.barrierreefpoolsperth.com.au\/wp-content\/uploads\/Resort-8_1m-x-5_2m-Hampton-Grey-Shimmer-success_5.jpg","https:\/\/www.barrierreefpoolsperth.com.au\/wp-content\/uploads\/Resort-8_1m-x-5_2m-Hampton-Grey-Shimmer-success_6.jpg","https:\/\/www.barrierreefpoolsperth.com.au\/wp-content\/uploads\/Resort-8_1m-x-5_2m-Hampton-Grey-Shimmer-success_7.jpg","https:\/\/www.barrierreefpoolsperth.com.au\/wp-content\/uploads\/Resort-8_1m-x-5_2m-Hampton-Grey-Shimmer-success_8.jpg","https:\/\/www.barrierreefpoolsperth.com.au\/wp-content\/uploads\/Resort-8_1m-x-5_2m-Hampton-Grey-Shimmer-success_9.jpg","https:\/\/www.barrierreefpoolsperth.com.au\/wp-content\/uploads\/Resort-8_1m-x-5_2m-Hampton-Grey-Shimmer-success_10.jpg","https:\/\/www.barrierreefpoolsperth.com.au\/wp-content\/uploads\/Resort-8_1m-x-5_2m-Hampton-Grey-Shimmer-success_11.jpg","https:\/\/www.barrierreefpoolsperth.com.au\/wp-content\/uploads\/Resort-8_1m-x-5_2m-Hampton-Grey-Shimmer-success_12.jpg"]
Watch Video
✕
View Details
Sunseeker 7.6m x 4.4m Hampton Grey Shimmer Location Kardinya
https://youtu.be/BBg7diOIQv8
["https:\/\/www.barrierreefpoolsperth.com.au\/wp-content\/uploads\/sunseeker-7.6m-4.4m-hampton-grey-shimmer-kardinya-galleryimage-23-1024x683.jpg","https:\/\/www.barrierreefpoolsperth.com.au\/wp-content\/uploads\/sunseeker-7.6m-4.4m-hampton-grey-shimmer-kardinya-galleryimage-30-1024x683.jpg","https:\/\/www.barrierreefpoolsperth.com.au\/wp-content\/uploads\/sunseeker-7.6m-4.4m-hampton-grey-shimmer-kardinya-galleryimage-3-1024x683.jpg","https:\/\/www.barrierreefpoolsperth.com.au\/wp-content\/uploads\/sunseeker-7.6m-4.4m-hampton-grey-shimmer-kardinya-galleryimage-21-1024x683.jpg","https:\/\/www.barrierreefpoolsperth.com.au\/wp-content\/uploads\/sunseeker-7.6m-4.4m-hampton-grey-shimmer-kardinya-galleryimage-27-1024x683.jpg","https:\/\/www.barrierreefpoolsperth.com.au\/wp-content\/uploads\/sunseeker-7.6m-4.4m-hampton-grey-shimmer-kardinya-galleryimage-4-1024x683.jpg","https:\/\/www.barrierreefpoolsperth.com.au\/wp-content\/uploads\/sunseeker-7.6m-4.4m-hampton-grey-shimmer-kardinya-galleryimage-17-1024x683.jpg","https:\/\/www.barrierreefpoolsperth.com.au\/wp-content\/uploads\/sunseeker-7.6m-4.4m-hampton-grey-shimmer-kardinya-galleryimage-7-1024x683.jpg","https:\/\/www.barrierreefpoolsperth.com.au\/wp-content\/uploads\/sunseeker-7.6m-4.4m-hampton-grey-shimmer-kardinya-galleryimage-8-1024x683.jpg","https:\/\/www.barrierreefpoolsperth.com.au\/wp-content\/uploads\/sunseeker-7.6m-4.4m-hampton-grey-shimmer-kardinya-galleryimage-29-1024x683.jpg","https:\/\/www.barrierreefpoolsperth.com.au\/wp-content\/uploads\/sunseeker-7.6m-4.4m-hampton-grey-shimmer-kardinya-galleryimage-28-1024x683.jpg","https:\/\/www.barrierreefpoolsperth.com.au\/wp-content\/uploads\/sunseeker-7.6m-4.4m-hampton-grey-shimmer-kardinya-galleryimage-18-1024x683.jpg","https:\/\/www.barrierreefpoolsperth.com.au\/wp-content\/uploads\/sunseeker-7.6m-4.4m-hampton-grey-shimmer-kardinya-galleryimage-19-1024x683.jpg","https:\/\/www.barrierreefpoolsperth.com.au\/wp-content\/uploads\/sunseeker-7.6m-4.4m-hampton-grey-shimmer-kardinya-galleryimage-2-1024x683.jpg","https:\/\/www.barrierreefpoolsperth.com.au\/wp-content\/uploads\/sunseeker-7.6m-4.4m-hampton-grey-shimmer-kardinya-galleryimage-9-1024x683.jpg","https:\/\/www.barrierreefpoolsperth.com.au\/wp-content\/uploads\/sunseeker-7.6m-4.4m-hampton-grey-shimmer-kardinya-galleryimage-13-1024x683.jpg","https:\/\/www.barrierreefpoolsperth.com.au\/wp-content\/uploads\/sunseeker-7.6m-4.4m-hampton-grey-shimmer-kardinya-galleryimage-24-1024x683.jpg","https:\/\/www.barrierreefpoolsperth.com.au\/wp-content\/uploads\/sunseeker-7.6m-4.4m-hampton-grey-shimmer-kardinya-galleryimage-25-1024x683.jpg","https:\/\/www.barrierreefpoolsperth.com.au\/wp-content\/uploads\/sunseeker-7.6m-4.4m-hampton-grey-shimmer-kardinya-galleryimage-26-1024x683.jpg","https:\/\/www.barrierreefpoolsperth.com.au\/wp-content\/uploads\/sunseeker-7.6m-4.4m-hampton-grey-shimmer-kardinya-galleryimage-15-1024x683.jpg","https:\/\/www.barrierreefpoolsperth.com.au\/wp-content\/uploads\/sunseeker-7.6m-4.4m-hampton-grey-shimmer-kardinya-galleryimage-1024x683.jpg","https:\/\/www.barrierreefpoolsperth.com.au\/wp-content\/uploads\/sunseeker-7.6m-4.4m-hampton-grey-shimmer-kardinya-galleryimage-14-1024x683.jpg","https:\/\/www.barrierreefpoolsperth.com.au\/wp-content\/uploads\/sunseeker-7.6m-4.4m-hampton-grey-shimmer-kardinya-galleryimage-16-1024x683.jpg","https:\/\/www.barrierreefpoolsperth.com.au\/wp-content\/uploads\/sunseeker-7.6m-4.4m-hampton-grey-shimmer-kardinya-galleryimage-22-1024x683.jpg","https:\/\/www.barrierreefpoolsperth.com.au\/wp-content\/uploads\/sunseeker-7.6m-4.4m-hampton-grey-shimmer-kardinya-galleryimage-11-1024x683.jpg","https:\/\/www.barrierreefpoolsperth.com.au\/wp-content\/uploads\/sunseeker-7.6m-4.4m-hampton-grey-shimmer-kardinya-galleryimage-10-1024x683.jpg","https:\/\/www.barrierreefpoolsperth.com.au\/wp-content\/uploads\/sunseeker-7.6m-4.4m-hampton-grey-shimmer-kardinya-galleryimage-12-1024x683.jpg","https:\/\/www.barrierreefpoolsperth.com.au\/wp-content\/uploads\/sunseeker-7.6m-4.4m-hampton-grey-shimmer-kardinya-galleryimage-20-1024x683.jpg"]
Watch Video
✕
View Details
Alfresco Swim Spa 5.2m x 2.6m Hampton Grey Shimmer
["https:\/\/www.barrierreefpoolsperth.com.au\/wp-content\/uploads\/alfresco-spa-5-2m-hampton-grey-nedlands-1-1024x682.jpg"]
Watch Video
✕
View Details
Azure 7m x 3.2m Hampton Grey Shimmer
["https:\/\/www.barrierreefpoolsperth.com.au\/wp-content\/uploads\/azure-galleryimage-hero-1024x687.jpg","https:\/\/www.barrierreefpoolsperth.com.au\/wp-content\/uploads\/azure-galleryimage-13-1024x687.jpg","https:\/\/www.barrierreefpoolsperth.com.au\/wp-content\/uploads\/azure-galleryimage-12-1024x687.jpg","https:\/\/www.barrierreefpoolsperth.com.au\/wp-content\/uploads\/azure-galleryimage-11-1-1024x687.jpg","https:\/\/www.barrierreefpoolsperth.com.au\/wp-content\/uploads\/azure-galleryimage-10-1-1024x687.jpg","https:\/\/www.barrierreefpoolsperth.com.au\/wp-content\/uploads\/azure-galleryimage-9-1-1024x687.jpg","https:\/\/www.barrierreefpoolsperth.com.au\/wp-content\/uploads\/azure-galleryimage-7-1-1024x687.jpg","https:\/\/www.barrierreefpoolsperth.com.au\/wp-content\/uploads\/azure-galleryimage-6-1-1024x687.jpg","https:\/\/www.barrierreefpoolsperth.com.au\/wp-content\/uploads\/azure-galleryimage-5-1-1024x687.jpg","https:\/\/www.barrierreefpoolsperth.com.au\/wp-content\/uploads\/azure-galleryimage-4-1-1024x687.jpg","https:\/\/www.barrierreefpoolsperth.com.au\/wp-content\/uploads\/azure-galleryimage-3-1-1024x687.jpg","https:\/\/www.barrierreefpoolsperth.com.au\/wp-content\/uploads\/azure-galleryimage-2-1-1024x687.jpg","https:\/\/www.barrierreefpoolsperth.com.au\/wp-content\/uploads\/azure-galleryimage-1-1-1024x687.jpg"]
Watch Video
✕
View Details
Brampton 5.2m x 4.4m Hampton Grey Shimmer Location Como
["https:\/\/www.barrierreefpoolsperth.com.au\/wp-content\/uploads\/brampton-5-2m-x-4-4m-hampton-grey-shimmer-como-1-1024x975.jpg","https:\/\/www.barrierreefpoolsperth.com.au\/wp-content\/uploads\/brampton-5-2m-x-4-4m-hampton-grey-shimmer-como-hero-1024x682.jpg","https:\/\/www.barrierreefpoolsperth.com.au\/wp-content\/uploads\/brampton-5-2m-x-4-4m-hampton-grey-shimmer-como-5-1024x682.jpg","https:\/\/www.barrierreefpoolsperth.com.au\/wp-content\/uploads\/brampton-5-2m-x-4-4m-hampton-grey-shimmer-como-4-1024x431.jpg","https:\/\/www.barrierreefpoolsperth.com.au\/wp-content\/uploads\/brampton-5-2m-x-4-4m-hampton-grey-shimmer-como-3-915x1024.jpg","https:\/\/www.barrierreefpoolsperth.com.au\/wp-content\/uploads\/brampton-5-2m-x-4-4m-hampton-grey-shimmer-como-2-1024x444.jpg"]
Watch Video
✕
View Details
Caprice Slimline 5.2m x 2.8m Hampton Grey Shimmer
["https:\/\/www.barrierreefpoolsperth.com.au\/wp-content\/uploads\/caprice-slimline-5-2m-hampton-grey-shimmer-3-1024x889.jpg","https:\/\/www.barrierreefpoolsperth.com.au\/wp-content\/uploads\/caprice-slimline-5-2m-hampton-grey-shimmer-4.jpg","https:\/\/www.barrierreefpoolsperth.com.au\/wp-content\/uploads\/caprice-slimline-5-2m-hampton-grey-shimmer-hero-1024x765.jpg","https:\/\/www.barrierreefpoolsperth.com.au\/wp-content\/uploads\/caprice-slimline-5-2m-hampton-grey-shimmer-1-1024x765.jpg","https:\/\/www.barrierreefpoolsperth.com.au\/wp-content\/uploads\/caprice-slimline-5-2m-hampton-grey-shimmer-2-1024x893.jpg"]
Watch Video
✕
View Details
Hamilton Spa 3.8m x 1.6m Hampton Grey Shimmer Location Duncraig
["https:\/\/www.barrierreefpoolsperth.com.au\/wp-content\/uploads\/hamilton-spa-3-8m-hampton-grey-shimmer-duncraig-1-1024x682.jpg","https:\/\/www.barrierreefpoolsperth.com.au\/wp-content\/uploads\/hamilton-spa-3-8m-hampton-grey-shimmer-duncraig-2-1024x682.jpg","https:\/\/www.barrierreefpoolsperth.com.au\/wp-content\/uploads\/hamilton-spa-3-8m-hampton-grey-shimmer-duncraig-3.jpg","https:\/\/www.barrierreefpoolsperth.com.au\/wp-content\/uploads\/hamilton-spa-3-8m-hampton-grey-shimmer-duncraig-4-1024x640.jpg","https:\/\/www.barrierreefpoolsperth.com.au\/wp-content\/uploads\/hamilton-spa-3-8m-hampton-grey-shimmer-duncraig-5-1024x637.jpg","https:\/\/www.barrierreefpoolsperth.com.au\/wp-content\/uploads\/hamilton-spa-3-8m-hampton-grey-shimmer-duncraig-6.jpg","https:\/\/www.barrierreefpoolsperth.com.au\/wp-content\/uploads\/hamilton-spa-3-8m-hampton-grey-shimmer-duncraig-7-1024x427.jpg","https:\/\/www.barrierreefpoolsperth.com.au\/wp-content\/uploads\/hamilton-spa-3-8m-hampton-grey-shimmer-duncraig-8.jpg","https:\/\/www.barrierreefpoolsperth.com.au\/wp-content\/uploads\/hamilton-spa-3-8m-hampton-grey-shimmer-duncraig-hero-1024x682.jpg","https:\/\/www.barrierreefpoolsperth.com.au\/wp-content\/uploads\/hamilton-spa-3-8m-hampton-grey-shimmer-duncraig-hero-2.jpg","https:\/\/www.barrierreefpoolsperth.com.au\/wp-content\/uploads\/hamilton-spa-3-8m-hampton-grey-shimmer-duncraig-hero-3-1024x683.jpg"]
Watch Video
✕
View Details
Lap Pool 8.3m x 3.5m – Hampton Grey Shimmer
["https:\/\/www.barrierreefpoolsperth.com.au\/wp-content\/uploads\/BRP_Lap-Pool-8-3m-x-3-5m_Hampton-Grey-Shimmer_02-1024x765.webp","https:\/\/www.barrierreefpoolsperth.com.au\/wp-content\/uploads\/BRP_Lap-Pool-8-3m-x-3-5m_Hampton-Grey-Shimmer_01-1024x765.webp","https:\/\/www.barrierreefpoolsperth.com.au\/wp-content\/uploads\/BRP_Lap-Pool-8-3m-x-3-5m_Hampton-Grey-Shimmer_03-1024x765.webp"]
Watch Video
✕
View Details
Majestic 8.5m x 4.4m Hampton Grey Shimmer
["https:\/\/www.barrierreefpoolsperth.com.au\/wp-content\/uploads\/majestic-8-5m-hampton-grey-shimmer-4-1024x765.jpg","https:\/\/www.barrierreefpoolsperth.com.au\/wp-content\/uploads\/majestic-8-5m-hampton-grey-shimmer-hero-1024x765.jpg","https:\/\/www.barrierreefpoolsperth.com.au\/wp-content\/uploads\/majestic-8-5m-hampton-grey-shimmer-1-1024x765.jpg","https:\/\/www.barrierreefpoolsperth.com.au\/wp-content\/uploads\/majestic-8-5m-hampton-grey-shimmer-2-1024x765.jpg","https:\/\/www.barrierreefpoolsperth.com.au\/wp-content\/uploads\/majestic-8-5m-hampton-grey-shimmer-3-1024x765.jpg"]
Watch Video
✕
View Details
Majestic 8.5m x 4.4m Hampton Grey Shimmer Location Floreat
["https:\/\/www.barrierreefpoolsperth.com.au\/wp-content\/uploads\/8-5m-majestic-electric-pool-floreat-1-1024x1024.jpg","https:\/\/www.barrierreefpoolsperth.com.au\/wp-content\/uploads\/8-5m-majestic-electric-pool-floreat-2-1024x947.jpg","https:\/\/www.barrierreefpoolsperth.com.au\/wp-content\/uploads\/8-5m-majestic-electric-pool-floreat-3-1024x683.jpg","https:\/\/www.barrierreefpoolsperth.com.au\/wp-content\/uploads\/8-5m-majestic-electric-pool-floreat-4-1024x546.jpg","https:\/\/www.barrierreefpoolsperth.com.au\/wp-content\/uploads\/8-5m-majestic-electric-pool-floreat-5-1024x683.jpg"]
Watch Video
✕
View Details
Monaco 7.5m x 3.8m Hampton Grey Shimmer Location O’Connor
["https:\/\/www.barrierreefpoolsperth.com.au\/wp-content\/uploads\/7.5m-billabong-pool-featured-Image.jpg","https:\/\/www.barrierreefpoolsperth.com.au\/wp-content\/uploads\/7.5m-billabong-pool-3.jpg","https:\/\/www.barrierreefpoolsperth.com.au\/wp-content\/uploads\/7.5m-billabong-pool-2.jpg","https:\/\/www.barrierreefpoolsperth.com.au\/wp-content\/uploads\/7.5m-billabong-pool-5.jpg","https:\/\/www.barrierreefpoolsperth.com.au\/wp-content\/uploads\/7.5m-billabong-pool-4.jpg"]
Watch Video
✕
View Details
Monaco 8.5m x 3.8m & 2.6m Spa Hampton Grey Shimmer Location South Perth
["https:\/\/www.barrierreefpoolsperth.com.au\/wp-content\/uploads\/8-5mMonaco2-6mSpa-1024x656.jpg","https:\/\/www.barrierreefpoolsperth.com.au\/wp-content\/uploads\/8-5mMonaco2-6mSpa1-1024x656.jpg","https:\/\/www.barrierreefpoolsperth.com.au\/wp-content\/uploads\/8-5mMonaco2-mSpa2-1024x656.jpg","https:\/\/www.barrierreefpoolsperth.com.au\/wp-content\/uploads\/8-5mMonaco2-mSpa3-1024x656.jpg","https:\/\/www.barrierreefpoolsperth.com.au\/wp-content\/uploads\/8-5mMonaco2-mSpa4-1024x656.jpg","https:\/\/www.barrierreefpoolsperth.com.au\/wp-content\/uploads\/8-5mMonaco2-mSpa5-1024x656.jpg","https:\/\/www.barrierreefpoolsperth.com.au\/wp-content\/uploads\/8-5mMonaco2-mSpa6-1024x656.jpg","https:\/\/www.barrierreefpoolsperth.com.au\/wp-content\/uploads\/8-5mMonaco2-mSpa8-1024x656.jpg"]
Watch Video
✕
View Details
Monaco Slimline 6.2m x 2.8m Hampton Grey Shimmer Applecross
["https:\/\/www.barrierreefpoolsperth.com.au\/wp-content\/uploads\/monaco-slimline-6-2m-hampton-grey-shimmer-applecross-hero-1024x894.jpg","https:\/\/www.barrierreefpoolsperth.com.au\/wp-content\/uploads\/6-2mmonacoslimlineapplecross4-1024x656.jpg","https:\/\/www.barrierreefpoolsperth.com.au\/wp-content\/uploads\/6-2mmonacoslimlineapplecross6-1024x656.jpg","https:\/\/www.barrierreefpoolsperth.com.au\/wp-content\/uploads\/6-2mmonacoslimlineapplecross8-1024x656.jpg","https:\/\/www.barrierreefpoolsperth.com.au\/wp-content\/uploads\/6-2mmonacoslimlineapplecross9-1024x656.jpg","https:\/\/www.barrierreefpoolsperth.com.au\/wp-content\/uploads\/monaco-slimline-6-2m-hampton-grey-shimmer-applecross-1-1024x683.jpg","https:\/\/www.barrierreefpoolsperth.com.au\/wp-content\/uploads\/6-2mmonacoslimlineapplecross12-1024x656.jpg","https:\/\/www.barrierreefpoolsperth.com.au\/wp-content\/uploads\/6-2mmonacoslimlineapplecross13-1024x656.jpg","https:\/\/www.barrierreefpoolsperth.com.au\/wp-content\/uploads\/6-2mmonacoslimlineapplecross11-1024x656.jpg"]
Watch Video
✕
View Details
Monaco Spa 2.6m x 2.6m with Monaco Pool Hampton Grey Shimmer
["https:\/\/www.barrierreefpoolsperth.com.au\/wp-content\/uploads\/monaco-spa-2-6m-hampton-grey-shimmer-1-1024x683.jpg","https:\/\/www.barrierreefpoolsperth.com.au\/wp-content\/uploads\/monaco-spa-2-6m-hampton-grey-shimmer-2-1024x683.jpg","https:\/\/www.barrierreefpoolsperth.com.au\/wp-content\/uploads\/monaco-spa-2-6m-hampton-grey-shimmer-3-1024x683.jpg","https:\/\/www.barrierreefpoolsperth.com.au\/wp-content\/uploads\/monaco-spa-2-6m-hampton-grey-shimmer-4-1024x683.jpg","https:\/\/www.barrierreefpoolsperth.com.au\/wp-content\/uploads\/monaco-spa-2-6m-hampton-grey-shimmer-5-1024x683.jpg","https:\/\/www.barrierreefpoolsperth.com.au\/wp-content\/uploads\/monaco-spa-2-6m-hampton-grey-shimmer-6-1024x683.jpg","https:\/\/www.barrierreefpoolsperth.com.au\/wp-content\/uploads\/monaco-spa-2-6m-hampton-grey-shimmer-7-1024x683.jpg","https:\/\/www.barrierreefpoolsperth.com.au\/wp-content\/uploads\/monaco-spa-2-6m-hampton-grey-shimmer-8-1024x683.jpg","https:\/\/www.barrierreefpoolsperth.com.au\/wp-content\/uploads\/monaco-spa-2-6m-hampton-grey-shimmer-hero-1024x683.jpg","https:\/\/www.barrierreefpoolsperth.com.au\/wp-content\/uploads\/monaco-spa-2-6m-hampton-grey-shimmer-hero-2-1024x683.jpg"]
Watch Video
✕
View Details
Sunseeker 10.2m x 4.4m Hampton Grey Shimmer
["https:\/\/www.barrierreefpoolsperth.com.au\/wp-content\/uploads\/sunseeker-hero-1-1024x581.jpg","https:\/\/www.barrierreefpoolsperth.com.au\/wp-content\/uploads\/sunseeker-galleryimage1-1-1024x581.jpg","https:\/\/www.barrierreefpoolsperth.com.au\/wp-content\/uploads\/sunseeker-galleryimage2-1-1024x581.jpg","https:\/\/www.barrierreefpoolsperth.com.au\/wp-content\/uploads\/sunseeker-galleryimage4-1-1024x581.jpg","https:\/\/www.barrierreefpoolsperth.com.au\/wp-content\/uploads\/sunseeker-galleryimage5-1-1024x581.jpg","https:\/\/www.barrierreefpoolsperth.com.au\/wp-content\/uploads\/sunseeker-10-2-m-hampton-grey-shimmer-1-1024x682.jpg","https:\/\/www.barrierreefpoolsperth.com.au\/wp-content\/uploads\/sunseeker-10-2-m-hampton-grey-shimmer-2-1024x740.jpg","https:\/\/www.barrierreefpoolsperth.com.au\/wp-content\/uploads\/sunseeker-10-2-m-hampton-grey-shimmer-3-1024x682.jpg","https:\/\/www.barrierreefpoolsperth.com.au\/wp-content\/uploads\/sunseeker-10-2-m-hampton-grey-shimmer-4-1024x682.jpg"]
Watch Video
✕
View Details